2019-09-01, 09:46 PM
Found a neat little regrade method today that might be an alternative to having to manually create a LUT in DrDre for every single scene. I have only done one test, so there's probably lots of room for improvement, however I quite liked it, so I thought I'd share and maybe others can tune in and improve on it.
It has one major downside and that is: You can't really regrade any part of the image that isn't in both sources. So for example it won't work to regrade an Open Matte version with a scope versions colors. Well, I haven't tried it, but I can't imagine how it would work. Feel free to try it obviously.
Another downside is that it's not nearly as precise as the DrDre method, but on the other hand it's very quick so it may be something nice for tests or quick projects.
An upside is that it's not very susceptible to problems from noise, since it works with a strong blur.
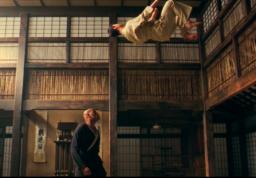
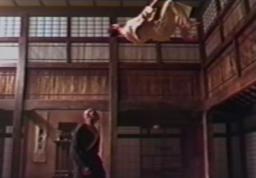
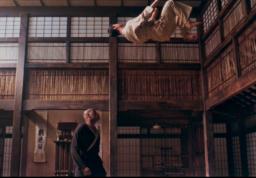
Anyway, here's an example from Matrix. UHD, CAM, REGRADE


Proper screenshot comparison:
http://www.framecompare.com/image-compar...n/D77WPNNX
Here's how it works
This guide is based on Photoshop, but you can very likely easily adopt it for AviSynth+
1. Align both your source images. Convert the image to linear RGB in 32 bit floating point. I'm not sure how important the linear part is here, you can do your own experiments. If you're wondering how to do this, you need to create a Custom RGB profile with Gamma 1.0. There are guides for this on Google if you struggle. 32 bit floating point is important because some intermediate values may be over 100% and would be clipped in 8 or 16 bit.
2. Put the image you want to regrade on the bottom.
3. Duplicate this image and apply a 50 pixel radius Gaussian Blur. You can experiment with the radius, this one was simply my initial test.
4. Set the blurred duplicate to "Divide" layer mode.
5. Put the (aligned) reference image on top of these two layers and also apply a 50px Gaussian Blur (or whatever radius you used in step 3).
6. Set this blurred reference image to mode "multiply".
7. That's it.
It's pretty self-explanatory, as you can see. It basically equalizes the rough color tone in an area by dividing through the average (50px radius) color tone of that area and then multiplying with the average of that area in the reference image. And since the radius (50px) is so big, it of course misses small details, but on the other hand it's absolutely not distracted by noise and slight misalignment and shitty reference quality (like a cam) and stuff like that.
And the nice thing is, it doesn't even seem to produce any ringing artifacts, at least with the example I used, because while you are of course multiplying with a blurred image, you are dividing by another blurred image first which has (ideally) the same image geometry, so you should end up with an image that still looks good and smooth. Though I can't vouch that it will work for all examples. Maybe it won't work for some high contrast scenes, who knows.
Not a magic trick or anything, but I was kind of happy with my initial result and I think it might be good whenever you don't need 100% precision or your reference has really bad image quality. Maybe it falls apart with other examples, I'm not sure, but hey, it's something.
Feedback always welcome.
It has one major downside and that is: You can't really regrade any part of the image that isn't in both sources. So for example it won't work to regrade an Open Matte version with a scope versions colors. Well, I haven't tried it, but I can't imagine how it would work. Feel free to try it obviously.
Another downside is that it's not nearly as precise as the DrDre method, but on the other hand it's very quick so it may be something nice for tests or quick projects.
An upside is that it's not very susceptible to problems from noise, since it works with a strong blur.
Anyway, here's an example from Matrix. UHD, CAM, REGRADE
Proper screenshot comparison:
http://www.framecompare.com/image-compar...n/D77WPNNX
Here's how it works
This guide is based on Photoshop, but you can very likely easily adopt it for AviSynth+
1. Align both your source images. Convert the image to linear RGB in 32 bit floating point. I'm not sure how important the linear part is here, you can do your own experiments. If you're wondering how to do this, you need to create a Custom RGB profile with Gamma 1.0. There are guides for this on Google if you struggle. 32 bit floating point is important because some intermediate values may be over 100% and would be clipped in 8 or 16 bit.
2. Put the image you want to regrade on the bottom.
3. Duplicate this image and apply a 50 pixel radius Gaussian Blur. You can experiment with the radius, this one was simply my initial test.
4. Set the blurred duplicate to "Divide" layer mode.
5. Put the (aligned) reference image on top of these two layers and also apply a 50px Gaussian Blur (or whatever radius you used in step 3).
6. Set this blurred reference image to mode "multiply".
7. That's it.
It's pretty self-explanatory, as you can see. It basically equalizes the rough color tone in an area by dividing through the average (50px radius) color tone of that area and then multiplying with the average of that area in the reference image. And since the radius (50px) is so big, it of course misses small details, but on the other hand it's absolutely not distracted by noise and slight misalignment and shitty reference quality (like a cam) and stuff like that.
And the nice thing is, it doesn't even seem to produce any ringing artifacts, at least with the example I used, because while you are of course multiplying with a blurred image, you are dividing by another blurred image first which has (ideally) the same image geometry, so you should end up with an image that still looks good and smooth. Though I can't vouch that it will work for all examples. Maybe it won't work for some high contrast scenes, who knows.
Not a magic trick or anything, but I was kind of happy with my initial result and I think it might be good whenever you don't need 100% precision or your reference has really bad image quality. Maybe it falls apart with other examples, I'm not sure, but hey, it's something.
Feedback always welcome.


![[Image: aligned2-mine.jpg]](https://i.postimg.cc/hSbTSHJJ/aligned2-mine.jpg)

![[Image: aligned2-drdre2.jpg]](https://i.postimg.cc/6Kgh0cY2/aligned2-drdre2.jpg)

![[Image: aligned2-cm.jpg]](https://i.postimg.cc/p2GnQrGv/aligned2-cm.jpg)